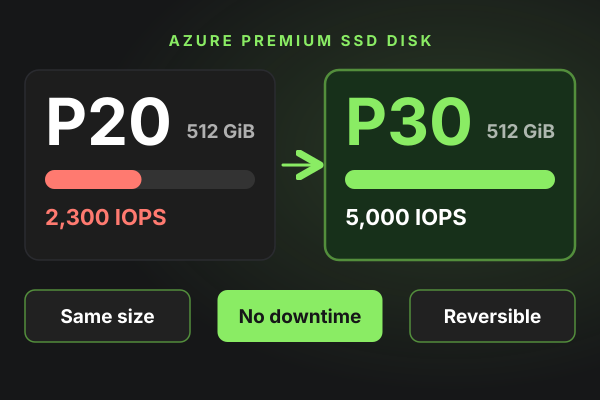
When a Premium SSD disk runs out of IOPS, most teams make it bigger. That fixes the IOPS problem, but Azure will not let you shrink the disk again, so you keep paying for the extra capacity. You can change the Azure disk performance tier instead. It raises IOPS and throughput without touching the size, needs no downtime, and you can reverse it.
Key Takeaways
- An Azure disk performance tier sets a Premium SSD disk's IOPS and throughput separately from its size. Moving a 512 GiB P20 disk to the P30 tier raises it from 2,300 to 5,000 IOPS and from 150 to 200 MB/s.
- The change is live. You do not deallocate the VM or detach the disk, except for shared disks, where you stop every attached VM first.
- You pay the higher tier's price while it is set: $135.17 a month for P30 against $73.22 for P20 in East US, so $61.95 a month extra.
- You can downgrade only once every 12 hours, and never below the disk's baseline tier. Growing the disk, by contrast, cannot be undone, because Azure does not support shrinking a managed disk.
What is an Azure disk Performance Tier?
An Azure disk performance tier is the IOPS and throughput level that Azure assigns to a Premium SSD managed disk. When you create a disk, Azure picks the tier from the size you choose. That default is the disk's baseline tier.
Microsoft's own wording is that you can change the performance tier "without changing the size of the disk and without downtime" (Microsoft Learn, change the performance of managed disks). In practice, this decouples performance from capacity on Premium SSD, which otherwise ties them together.
The table below shows the baseline performance and price of the Premium SSD tiers you will meet most often.
When Should you Change the Tier Instead of Resizing?
Change the performance tier when the disk needs more IOPS or throughput but not more space. Resize when you actually need capacity.
The three most common cases:
- Short peaks. Month-end close, a quarterly batch job, a data migration or a load test needs more IOPS for a few days. Raise the tier before, lower it after.
- A small disk with a heavy workload. A 256 GiB SQL Server log disk that is 30% full but hits its 1,100 IOPS cap. Growing it to 1 TiB for IOPS means paying for roughly 700 GiB of empty space forever.
- Testing before you commit. You suspect the disk is the bottleneck but are not sure. A tier change is a cheap, reversible experiment. Growing the disk is not, because you can't shrink it back.
Resizing is still right when the disk is filling up. If you need both space and performance, resize to the size you need first, then check whether its new baseline tier is enough before raising the tier.
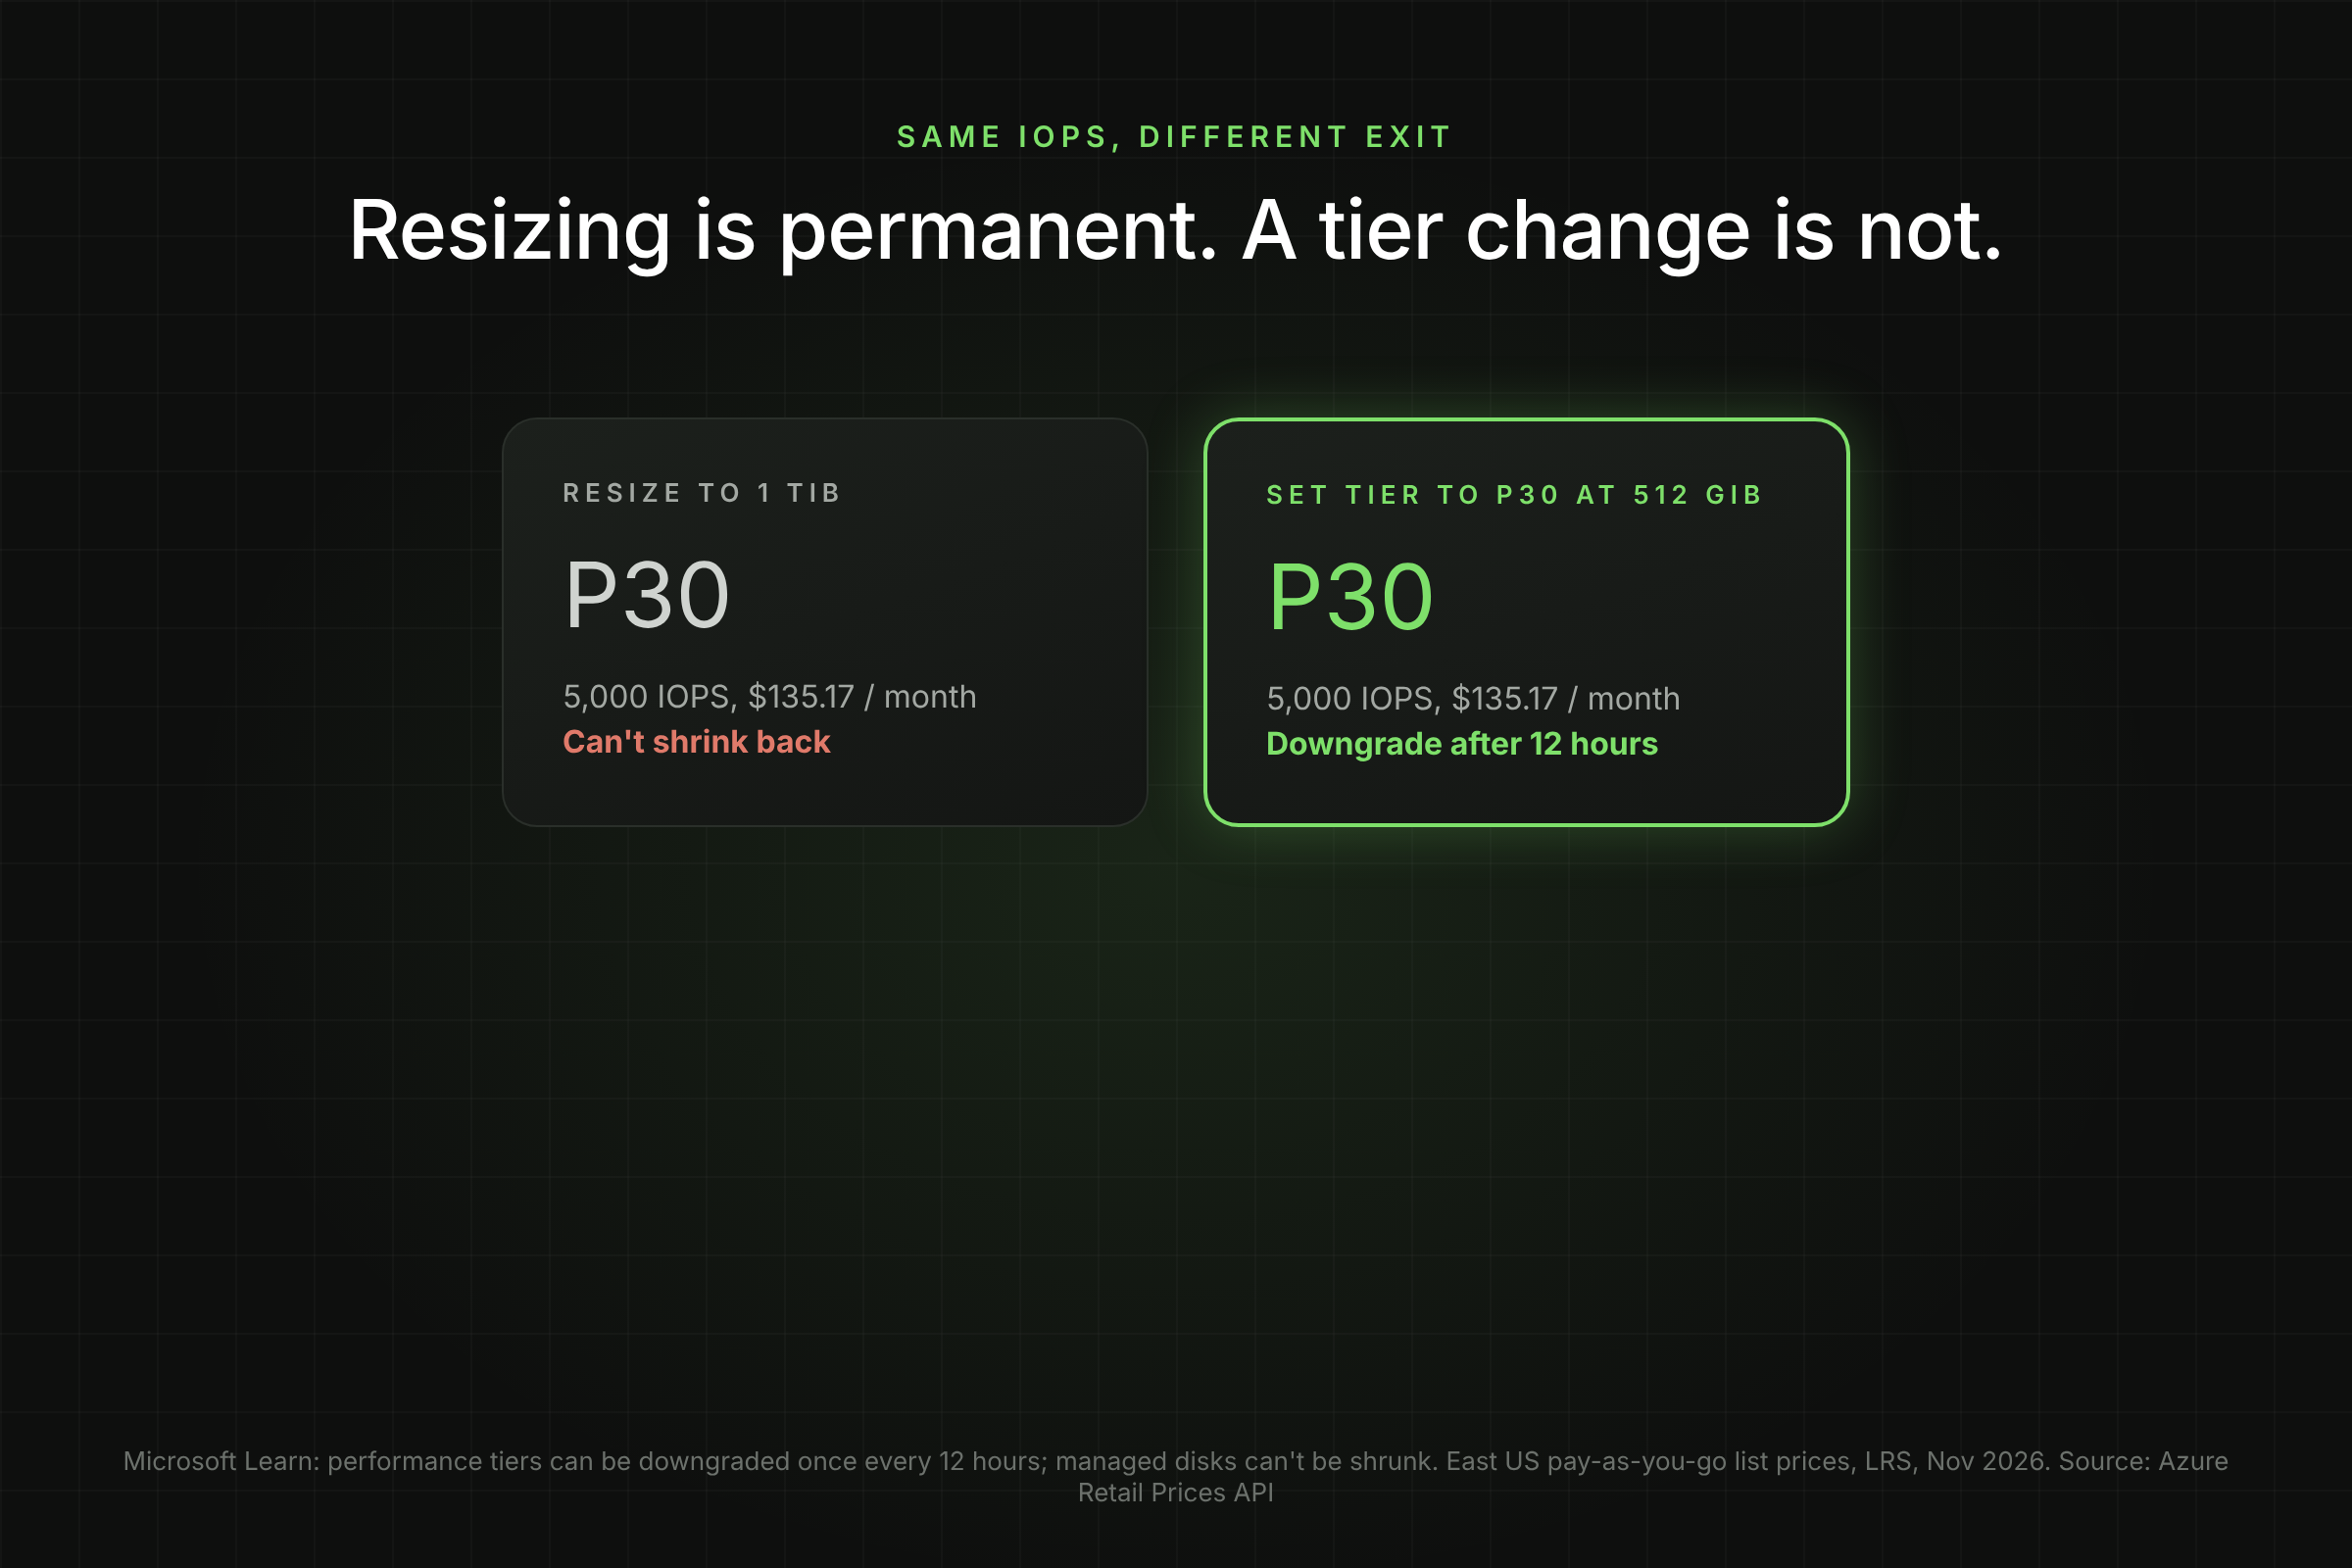
The core rule is simple. Azure lets you grow a managed disk but not shrink it: "Shrinking an existing disk isn't supported and might result in data loss" (Microsoft Learn, expand virtual hard disks). Every resize done for performance alone becomes a permanent cost.
Which disks Support Performance Tiers?
Only Premium SSD managed disks support performance tiers. Microsoft states that "changing the performance tier is currently only supported for Premium SSD managed disks."
Other disk types handle performance differently:
What are the restrictions?
Microsoft Learn lists four restrictions. Read them before you script anything:
- Premium SSD only, as above.
- Shared disks: "Performance tiers of shared disks can't be changed while attached to running VMs." Stop every VM the disk is attached to first.
- P60, P70 and P80 are available only for disks larger than 4,096 GiB.
- Downgrades: "A disk's performance tier can be downgraded only once every 12 hours." You also cannot set a tier below the disk's baseline tier.
One more practical limit: a 4 TiB disk with a P50 baseline cannot go higher, because P60 needs a disk above 4,096 GiB. P40 and P50 both top out at 7,500 IOPS. If you need more than that on a Premium SSD v1 disk, the tier change will not help.
How do You change The Performance Tier with Azure CLI?
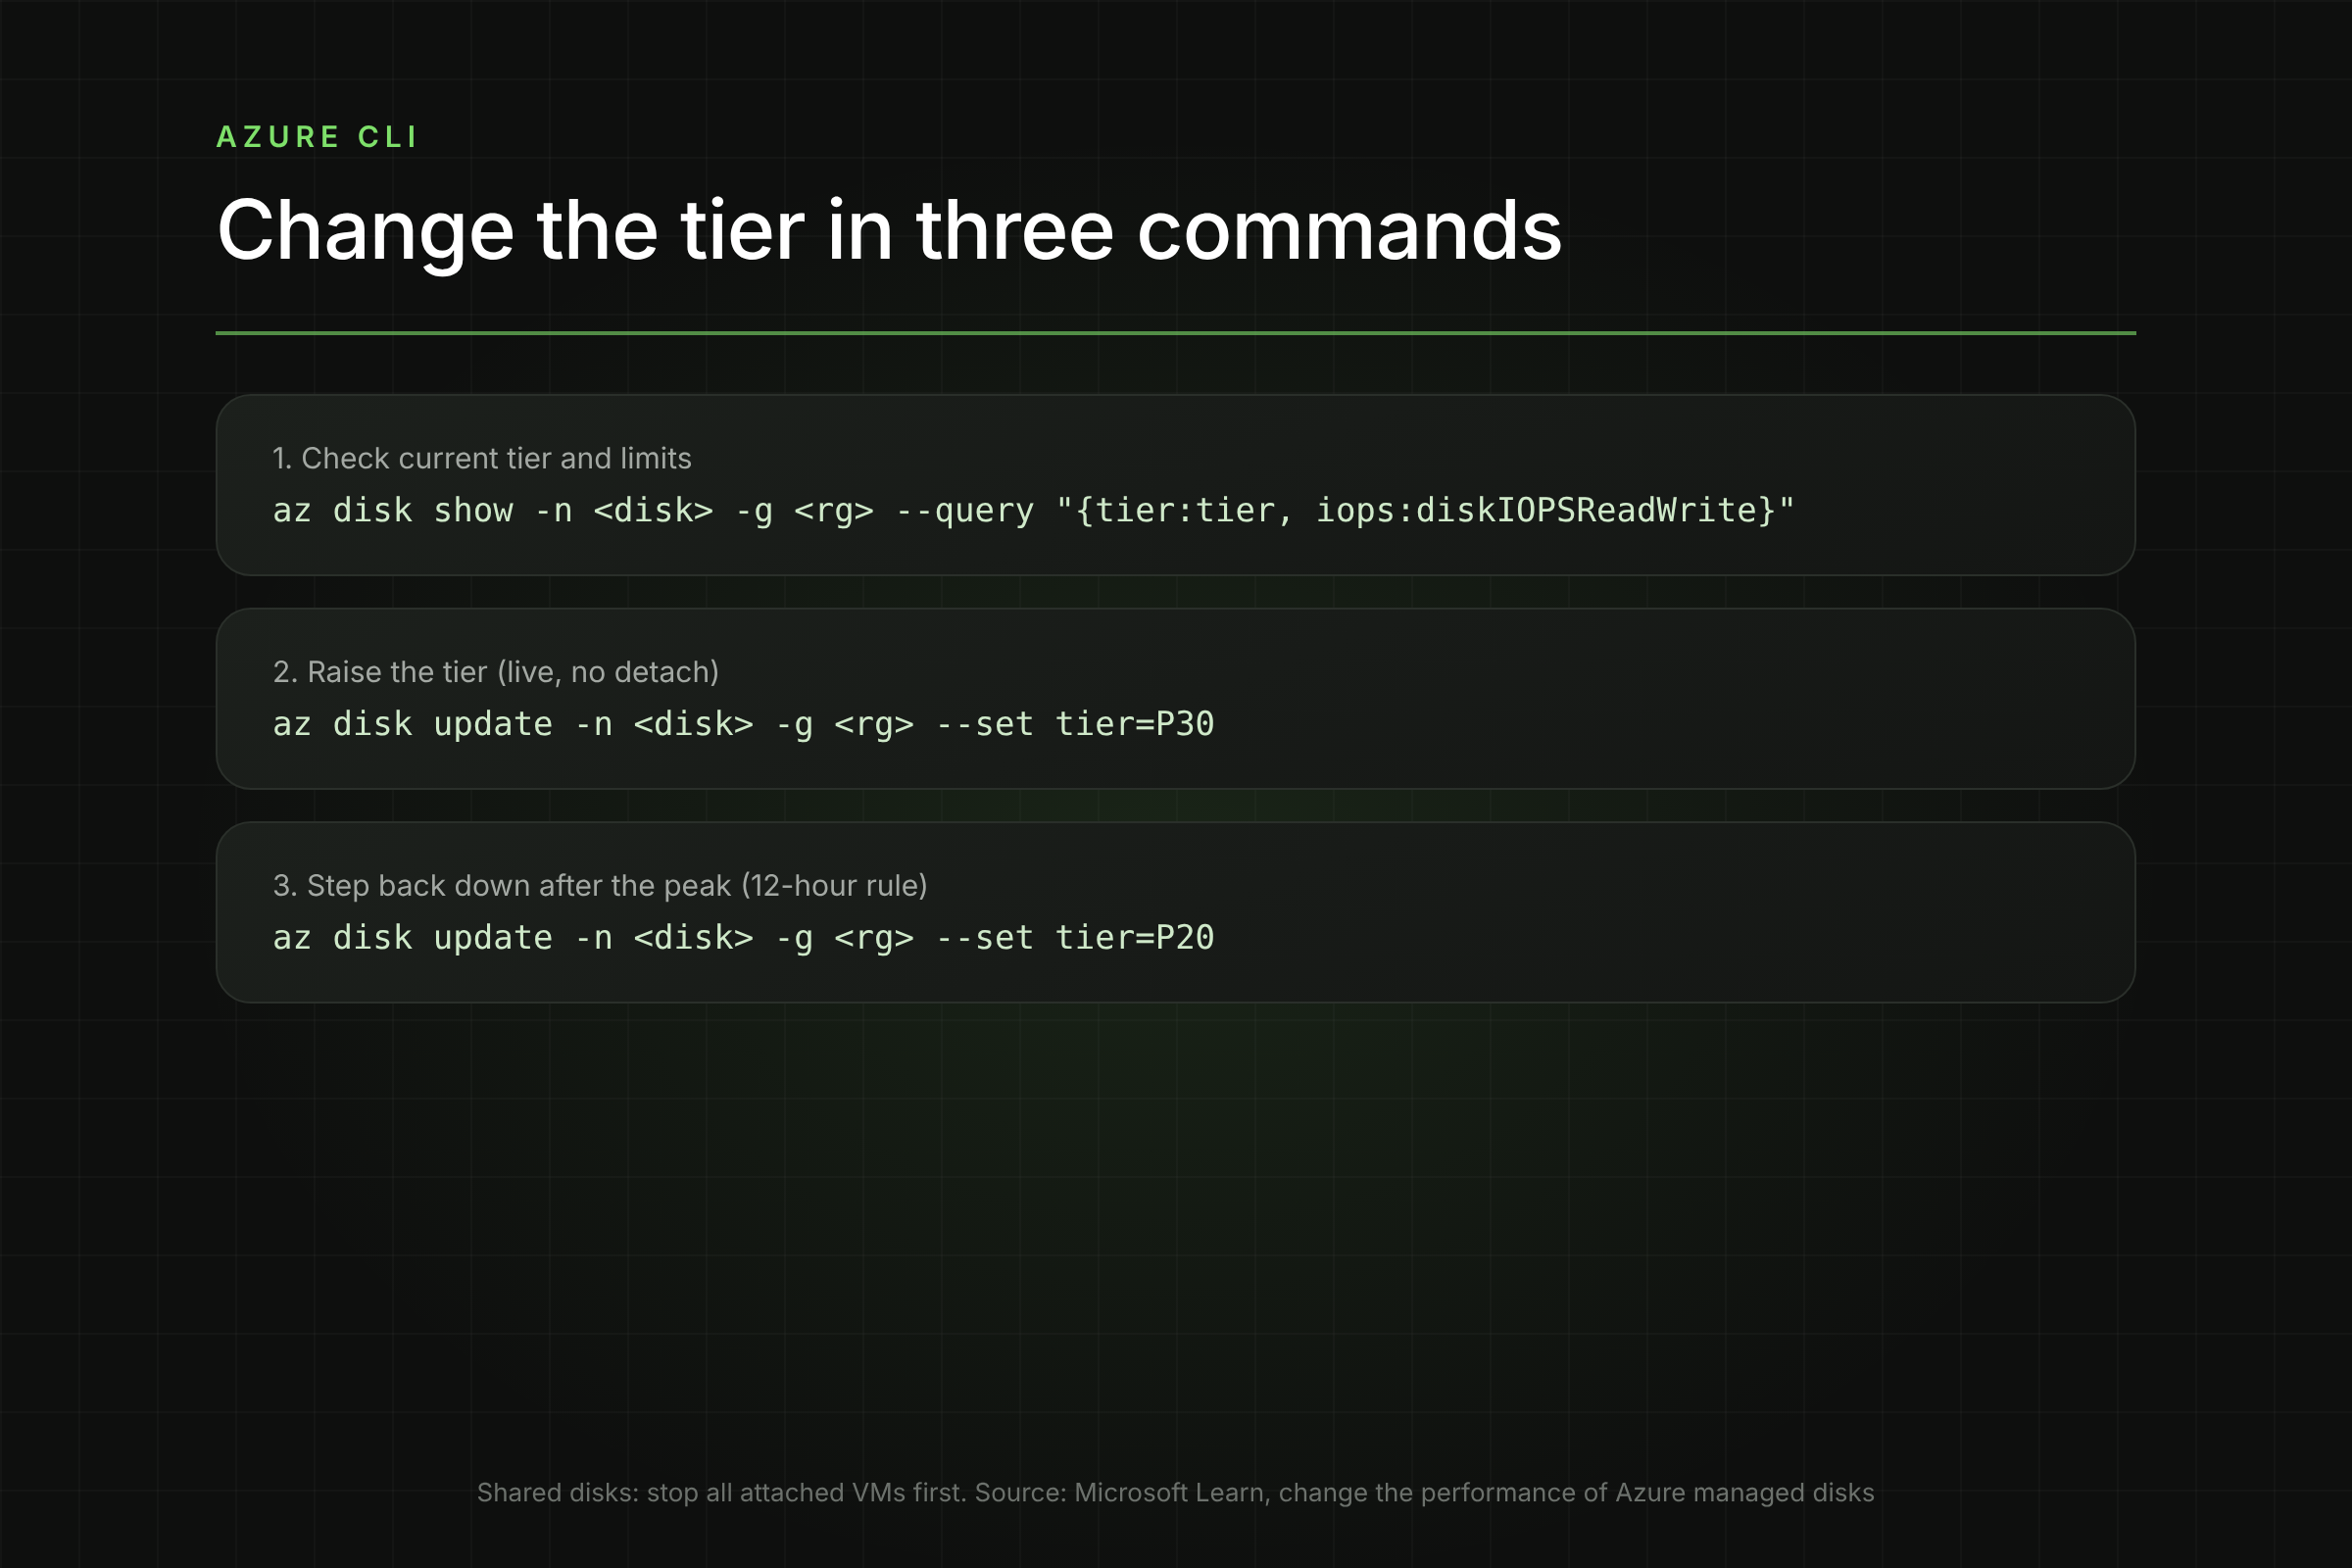
Use az disk update with --set tier=. The disk can stay attached and the VM can keep running.
1. Check the current size and tier:
az disk show -n <disk-name> -g <resource-group> \
--query "{size:diskSizeGB, sku:sku.name, tier:tier, iops:diskIOPSReadWrite, mbps:diskMBpsReadWrite}" -o table
2.Set the new tier:
az disk update -n <disk-name> -g <resource-group> --set tier=P30
3.Confirm the tier and the new lmits:
az disk show -n <disk-name> -g <resource-group> \
--query "{tier:tier, iops:diskIOPSReadWrite, mbps:diskMBpsReadWrite}" -o table
4.When the peak is over , and at least 12 hours after any earlier downgrade, set the tier back to the baseline
az disk update -n <disk-name> -g <resource-group> --set tier=P20
You can also set the tier at creation with az disk create ... --tier P30. That is useful for a disk you know will be small but busy from day one.
How do You Change it with PowerShell or The Portal?
PowerShell
Microsoft's documented pattern uses New-AzDiskUpdateConfig:
$diskUpdateConfig = New-AzDiskUpdateConfig -Tier 'P30'
Update-AzDisk -ResourceGroupName '<resource-group>' -DiskName '<disk-name>' -DiskUpdate $diskUpdateConfig
(Get-AzDisk -ResourceGroupName '<resource-group>' -DiskName '<disk-name>').Tier
Azure Portal
- Open the disk resource.
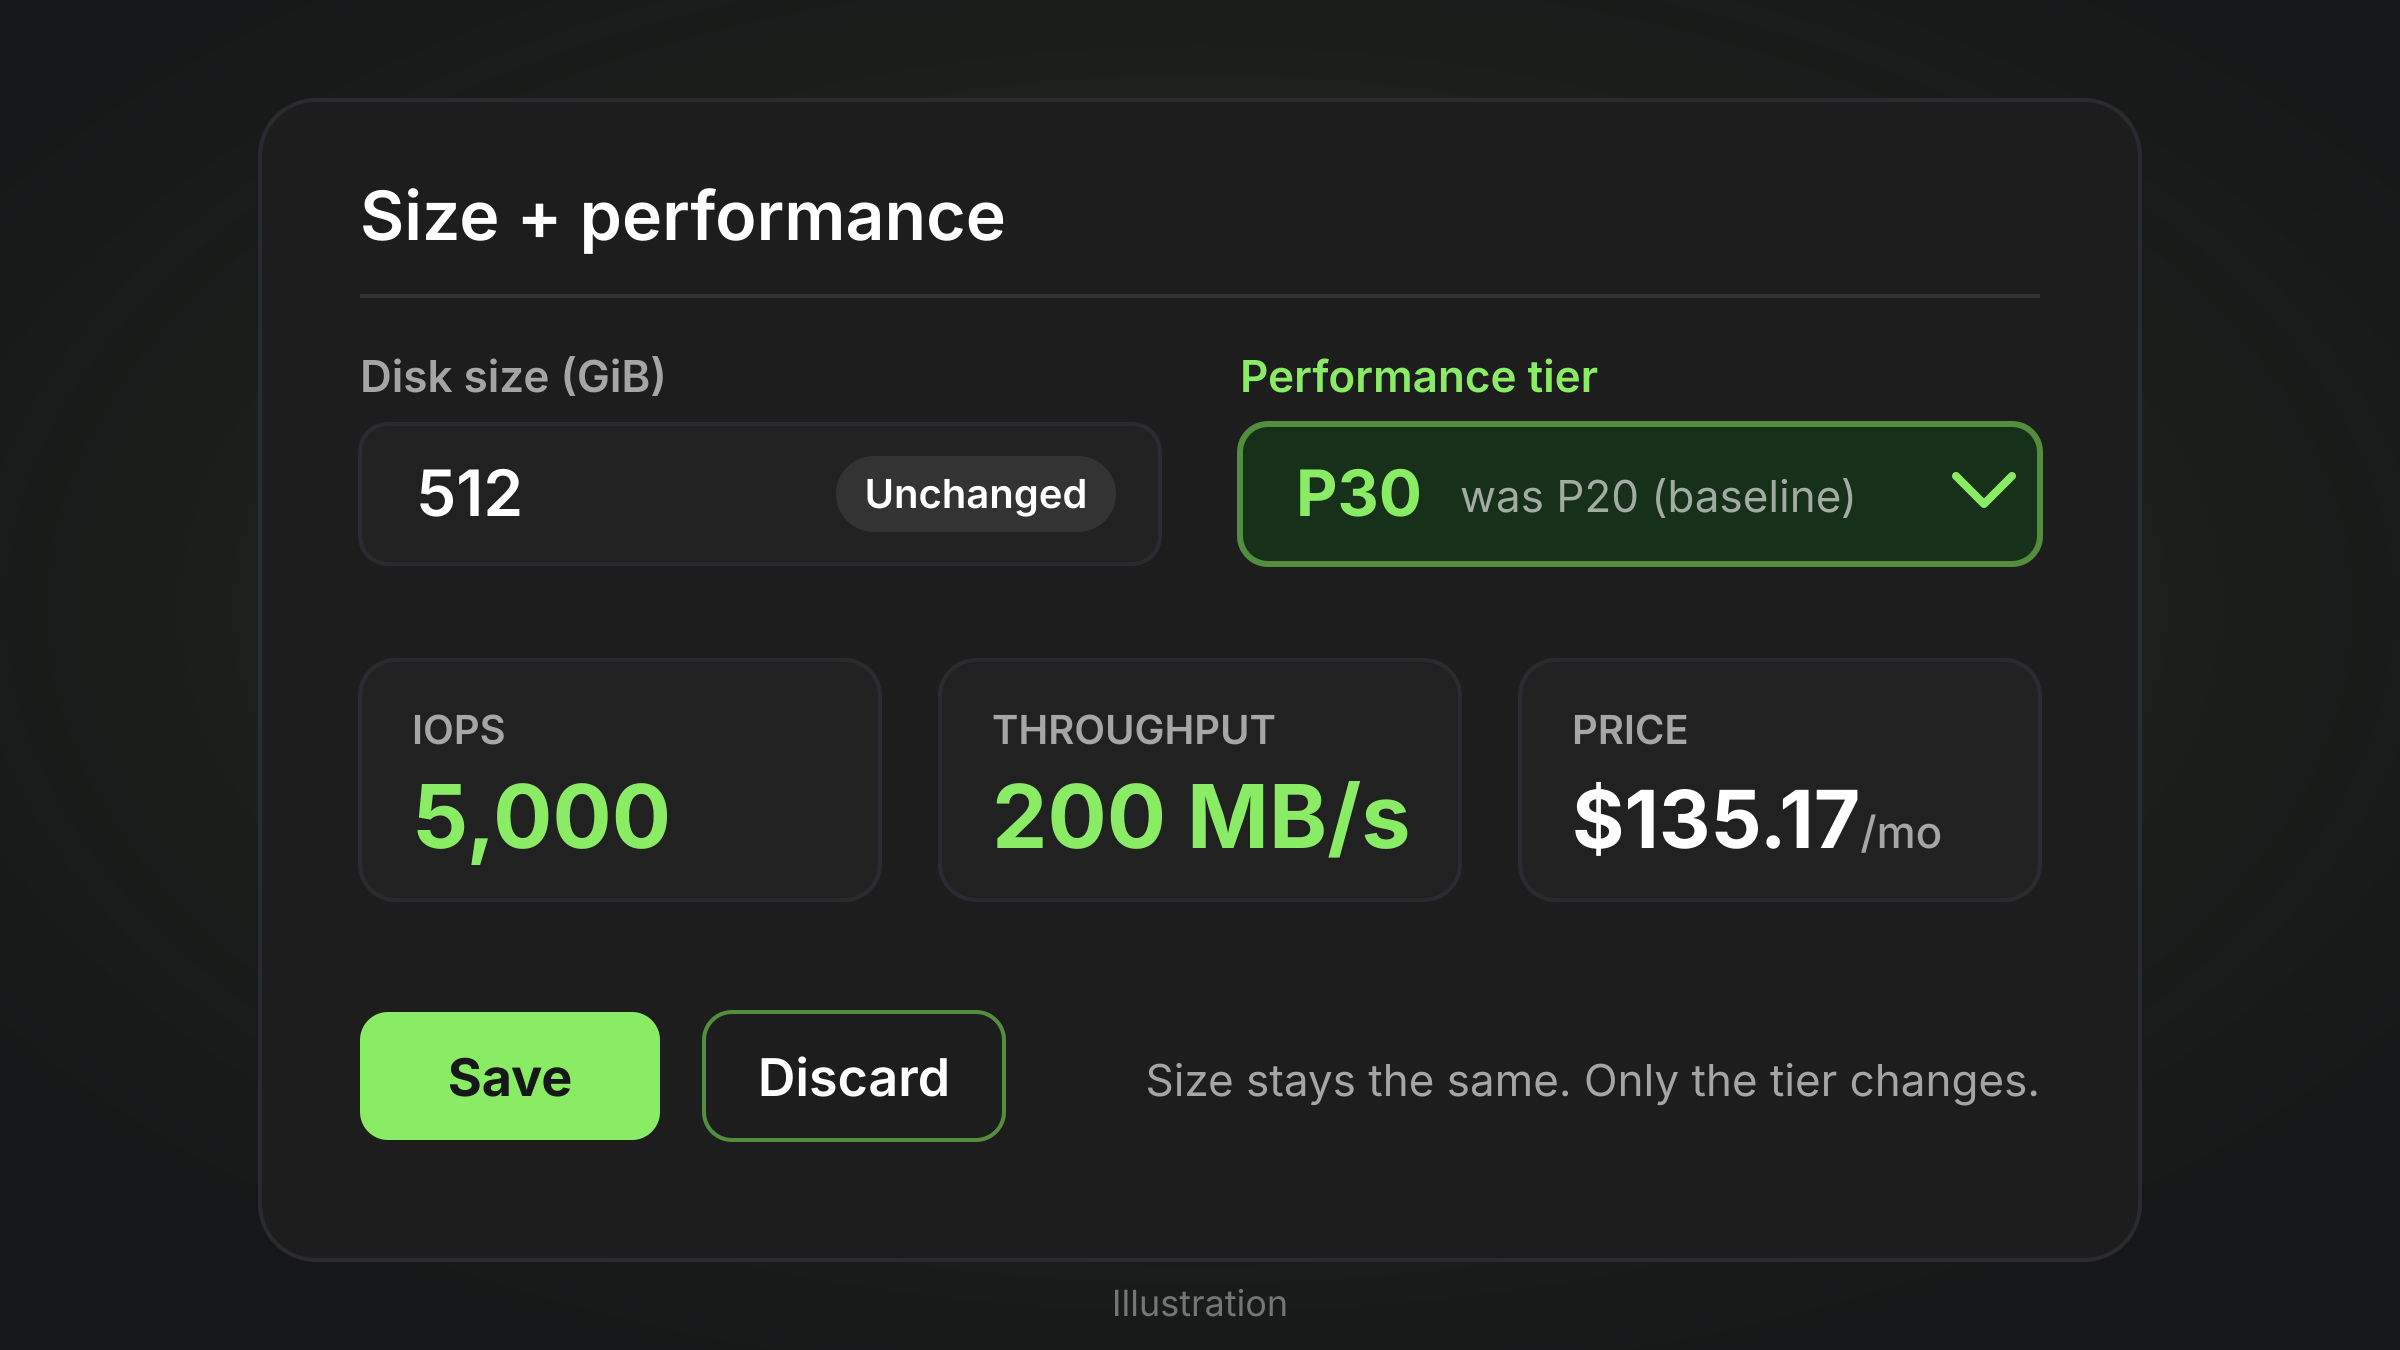
- Go to Size + performance.
- Choose a new tier under Performance tier. The size stays the same.
- Save, then confirm the tier on the disk's Overview page.
The portal shows only tiers at or above the baseline, which stops you from setting an invalid one.
Required Permissions
Changing the tier is a write on the disk resource, so you need a role that includes Microsoft.Compute/disks/write, such as Contributor or Virtual Machine Contributor on the disk's resource group. Reading metrics needs Monitoring Reader.
How do you Verify the Change Worked?
Verify in two places: the disk resource and the metrics. A tier that shows P30 but no change in delivered IOPS usually means the VM, not the disk, is the bottleneck.
1.Disk resource. az disk show should report the new tier, with diskIOPSReadWrite and diskMBpsReadWrite at the P30 values (5,000 and 200).
2.Disk metrics. In Azure Monitor, check Data Disk IOPS Consumed Percentage split by LUN. If it was at or near 100% before the change and now sits well below it under the same load, the change worked.
3.VM metrics. Check VM Uncached IOPS Consumed Percentage over the same window. If it is at 100%, the VM size caps you, and a higher disk tier adds cost with no gain.
az monitor metrics list --resource <vm-resource-id> \
--metrics "Data Disk IOPS Consumed Percentage" "VM Uncached IOPS Consumed Percentage" \
--filter "LUN eq '*'" --interval PT1M --aggregation Maximum --offset 24h
Use Maximum, not Average. One-minute averages hide the short throttling spikes that cause latency.
If the VM is the cap, we cover how to tell the two apart in How to Diagnose Premium SSD v2 Latency Before Buying More IOPS. The same metrics apply to Premium SSD v1 disks.
What does a Tier Change Cost?
You pay the price of the tier you set, not the tier the size implies. Microsoft's example: a 128 GiB P10 disk set to P50 is billed at the P50 rate until it is set back to P10 (Microsoft Learn, performance tiers).
Worked example 1: Permanent Tier Change vs Resize
A 512 GiB P20 disk at 40% used needs 5,000 IOPS full time.
The monthly price is identical. The difference is the exit. After a resize, the disk stays at 1 TiB and P30 pricing even if the workload drops. After a tier change, you can return to $73.22 a month at any time, subject to the 12-hour rule.
Worked example 2: A three-day Month-End Peak
The same P20 disk needs P30 performance for 72 hours at month-end. Managed disks are billed on an hourly, prorated basis, so you pay the P30 rate only while the tier is set.
- Extra cost per month at P30: $135.17 − $73.22 = $61.95
- Cost of 72 hours: $61.95 × 72 / 730 = $6.11
- Cost of resizing to 1 TiB for the same peak: $61.95 every month from then on, or $743.40 a year
That gap is why a tier change is the right default for predictable peaks.

Tier change, bursting or Premium SSD v2?
Pick the cheapest option that matches the shape of the demand. All three avoid a permanent resize.
Burst limits from Microsoft Learn, scalability targets. For the detail on both bursting models, see our guide to Azure disk bursting: credit-based vs on-demand.
When Premium SSD v2 Beats a Tier Change
For a data disk that needs 5,000 IOPS and 200 MB/s all the time, Premium SSD v2 is cheaper than any Premium SSD v1 option.
- Capacity: 512 GiB × $0.0803 = $41.11
- IOPS above the free 3,000: 2,000 × $0.00511 = $10.22
- Throughput above the free 125 MB/s: 75 × $0.04015 = $3.01
- Total: $54.34 a month, against $135.17 for P30
Prices: Azure Retail Prices API, Azure Premium SSD v2 LRS, East US, Nov 2026 (per-hour meters × 730). The catch is the move. Converting means a snapshot and a new disk, and Premium SSD v2 cannot be an OS disk or use host caching. For a steady, long-term need, that one-time effort usually pays back in the first month.
How do you change Tiers Safely?
A tier change is low risk, but production disks deserve a checklist.
- Confirm the disk is the bottleneck. Check both Data Disk and VM Uncached consumed percentages first, as above. Never raise a tier blind.
- Check the disk is not shared. If maxShares is greater than 1, you must stop every attached VM, so plan a window.
- Check the VM limit. The VM's uncached IOPS and MB/s cap must be higher than the new tier, or the extra performance is unusable.
- Record the baseline tier. Write down the original tier so you know where to return. Tag the disk, for example perf-tier-reason=monthend.
- Plan the downgrade. Remember the 12-hour rule. Schedule the step-down at least 12 hours after any previous downgrade, and set a reminder or an automation runbook.
- Verify on the bill. In Cost Management, filter by the disk resource. The meter should change to the higher tier while it is set and back afterwards.
There is no data risk in a tier change because the data and size do not change. The real risk is cost: a tier raised for a peak and never lowered.
Who Forgets to Lower the Tier?
Most teams do, which is where the savings leak. A tier change for a month-end peak becomes a permanent P30 when nobody owns the step-down. Across a fleet, this looks exactly like overprovisioning.
Lucidity's platform finds Premium SSD disks whose provisioned performance or capacity sits well above what the workload uses, and its AutoScaler module expands and shrinks data disks live with no downtime. Want to see where your disks are over-provisioned? Switch on Free Insights for a read-only report of disk utilization across your Azure subscriptions.
Frequently Asked Questions
Does changing the performance tier cause downtime?
No, for a normal disk. You don't need to deallocate the VM or detach the disk. The exception is a shared disk, which needs every attached VM stopped first.
How often can I change the performance tier?
You can raise it whenever you need. You can downgrade only once every 12 hours, and never below the disk's baseline tier.
Can I set a performance tier on Premium SSD v2 or Ultra Disk?
No. Performance tiers apply only to Premium SSD (v1). On Premium SSD v2 and Ultra Disk, you set IOPS and MB/s directly, up to 4 times per 24 hours.
Does a higher tier increase my VM's disk limits?
No. The VM size has its own uncached IOPS and MB/s cap. If the VM is already at that cap, a higher disk tier adds cost and no performance.
Can I use the P60 tier on a 2 TiB disk?
No. P60, P70 and P80 require a disk larger than 4,096 GiB.
Table of Contents
Sign Up